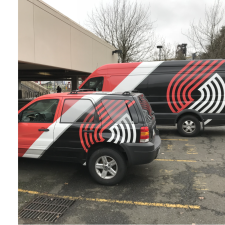
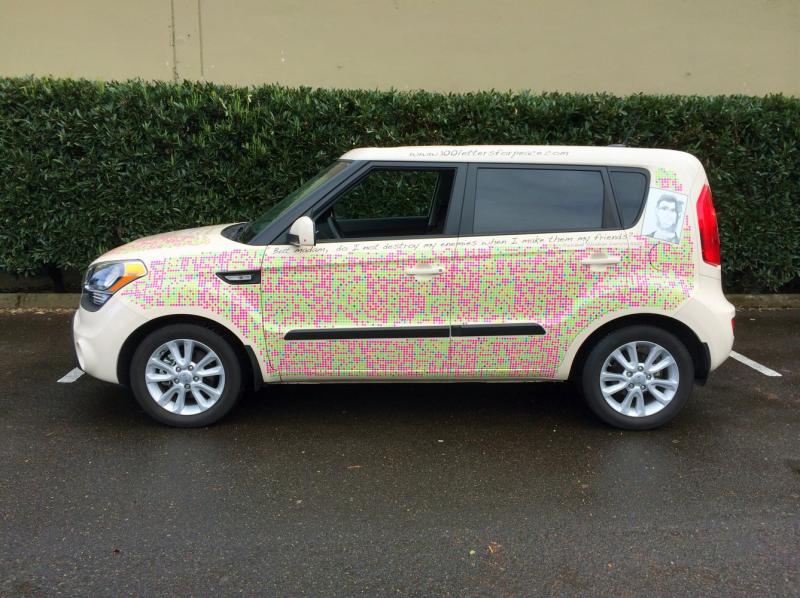
100 Letters For Peace Vehicle Wrap Project
The 100 Letters for Peace project was one peace activist’s way of pushing for nuclear disarmament. Sara Kirchenbaum’s New Year’s resolution for 2013 was to write 100 letters to President Obama in 2013. She ended up writing 99 paper letters—and she contacted us about making the 100th letter a mobile advertisement for peace, as a vehicle wrap.
The 100 Letters for Peace project highlights the difficulties inherent in applying vehicle wraps. Like many things in life, true experts make it look easy to turn your car into a moving message, but the truth is that vehicle wrap projects are not as easy as they may appear. Here are a few of the obstacles that popped up as we turned Sara’s 100th letter into a car graphic:
- Inaccurate graphic dimensions. Graphic size is key in large-scale printing, including vehicle wraps. If the graphic being used to create the wrap is the wrong size, the print may look blurry, or it may not fit properly on the car. In this project, the initial graphic was four inches too long even though we used the vehicle’s template from a popular auto library.
- Incomplete car profile. Imagine painting on a bumpy, curved canvas—that’s a little like applying a graphic to a vehicle exterior. In this Portland vehicle graphics project, certain vehicle details were missing from the template, requiring adjustment at final installation.
- Creative application methods. For this complex and meaningful project, it was especially important to have each dot on the graphic appear properly. So we used a mixture of a vehicle wrapping and tiny add-on graphics to make sure our results matched Sara’s vision.
Having decades of experience in designing, printing, and applying vehicle graphics in the Portland area, we’d like to present you with a few tips for creating a great vehicle wrap. And stay tuned in to this blog for a future in-depth post on how to do vehicle wraps right.
Vehicle Graphic Application Tips
- Bring in the Car for Detailed Measurement. When creating a vehicle graphic, we begin with a basic car template. In order to perfectly match the graphic to the car or truck, we must customize our template to account for specific elements, including the position of door handles, bumpers, curves, and other stylistic details. To make sure we get a wrap that fits like a glove, it’s important for the customer to bring in the vehicle for a full assessment.
- Remove Door Handles and Side Mirrors. To achieve a smooth application, we take side mirrors and door handles off of the vehicle. (Of course these are remounted once the wrap/graphic is installed.)
- Follow the Car’s Body when Designing Graphics. No vehicle has a perfectly straight body; for maximum impact we recommend taking the shape of the car or truck into account when designing your graphic.
Like all vehicle wraps, this set of graphics was an important personal statement. One seemingly small oversight could throw off the results. So we triple check everything on our vehicle wrap/graphic projects to make sure our customers will get exactly the effect they were hoping for. For additional tips on how to apply a wrap, including specific steps on heating vinyl, rubbing it down, stretching, and cutting seams, keep your eyes on this blog; we will soon post a more detailed post on properly applying vehicle wraps.